 |
USB Component
Version 6.6
MDK-Professional Middleware for USB Device and Host
|
|
USB Component
Version 6.6
MDK-Professional Middleware for USB Device and Host
|
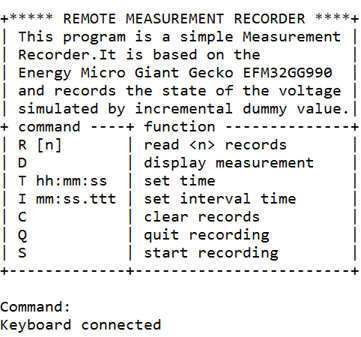
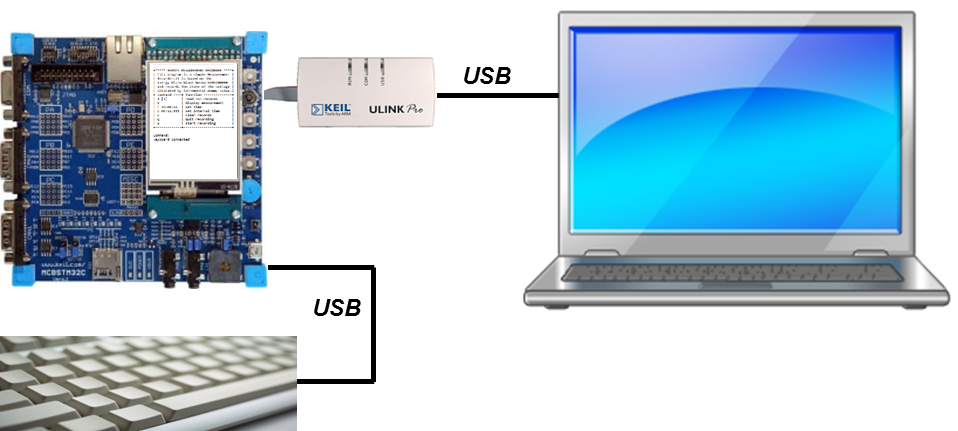
The following example application enables you to connect a USB keyboard to the development board. To keep it simple, the graphical LCD on the evaluation board is used to show the keyboard inputs. This is done using the Compiler software component with the appropriate user code templates.
The Abstract.txt file contained in the Documentation group of the Project window gives you more information on the general setup and the available I/O of the development board.
Open the example project in MDK (the Pack Installer's web page explains how to do this). The µVision Project window should display a similar project structure:
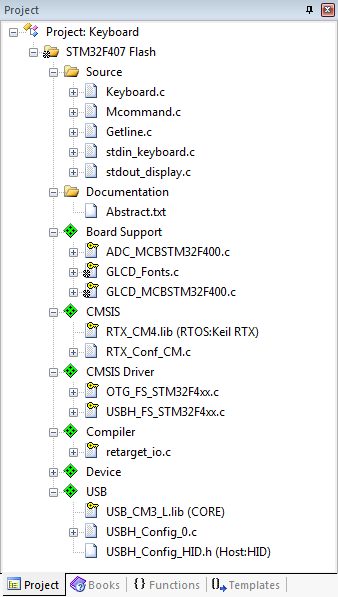
stdin_getchar is retargeted to the function USBH_HID_GetKeyboardKey of the USB Host component.stdout_putchar is retargeted to the function GLCD_DrawChar of the graphics display.You may now build and download the example project to the evaluation board using the µVision commands:
After these steps, the project should start executing on your evaluation kit. In case of errors, refer to the Evaluation Board User's Guide for configuration information.
The setup of the Evaluation Board hardware is described in the Abstract.txt file.