|
||
| Products Download Events Support Videos | ||

Technical Support
On-Line Manuals
µVision3 User's Guide
Watch Variables
![]() You may constantly view the contents of variables,
structures, and arrays. Open the Watch Window from the
View menu or with the toolbar. The Locals page shows
all local symbols of the current function. The Watch #1 and Watch #2
pages allow you to enter any program variables as described in the
following:
You may constantly view the contents of variables,
structures, and arrays. Open the Watch Window from the
View menu or with the toolbar. The Locals page shows
all local symbols of the current function. The Watch #1 and Watch #2
pages allow you to enter any program variables as described in the
following:
- Select the text <enter here> with a mouse click and wait a second. Another mouse click enters edit mode that allows you to add variables. In the same way you can modify variable values.
- Select a variable name in an Editor Window and open the local menu with a right mouse click and use the command Add to Watch Window.
- You can enter WatchSet in the Output Window – Command page.
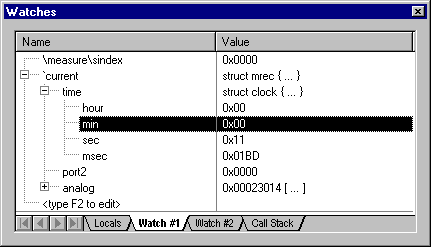
To remove a variable, click on the line and press the Delete key.
Structures and arrays open on demand when you click on the [+] symbol. Display lines are indented to reflect the nesting level.
The Watch Window updates at the end of each execution command. You enable may enable Periodic Window Update in the View menu to update the watch window during program execution.
View and Modify On-Chip Peripherals
µVision3 provides several ways to view and modify the on-chip peripherals used in your target program. You may directly view the results of the example below when you perform the following steps:
| Symbol | Description |
|---|---|
| Reset CPU and kill all defined breakpoints. | |
| If program execution is halted begin executing the MEASURE program. | |
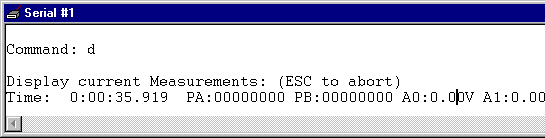
| Open the Serial Window #1 and enter the 'd' command for the MEASURE application. MEASURE shows the values from I/O Port2 and A/D input 0 – 3. The Serial Window shows the following output: |
You may now use the following procedures to supply input to the I/O pins:
Using Peripheral Dialog Boxes
µVision3 provides dialogs for: I/O Ports, Interrupts, Timers, A/D Converter, Serial Ports, and chip-specific peripherals. These dialogs can be opened from the Debug menu. For the MEASURE application you may open I/O Ports:Port2 and A/D Converter. The dialogs show the current status of the peripherals and you may directly change the input values.
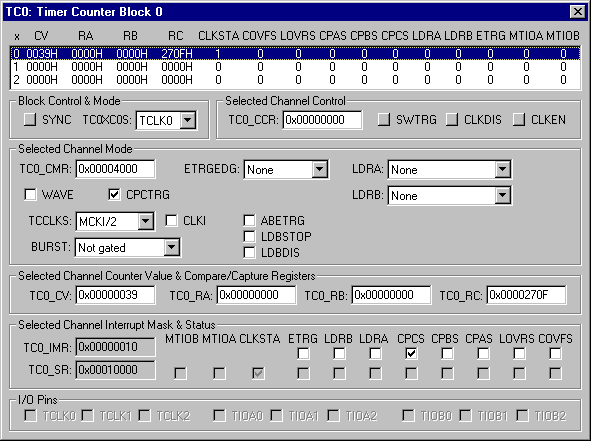
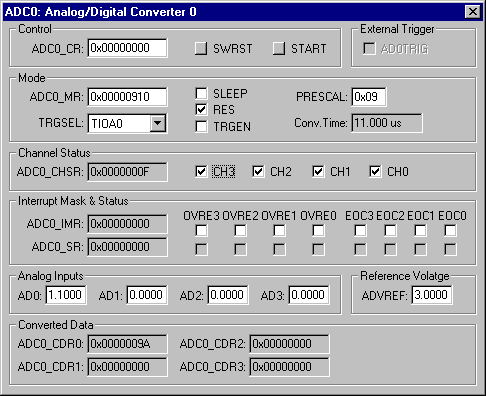
Each of these dialogs lists the related SFR symbols and shows the current status of the peripherals. To change the inputs, change the values of the Pins or Analog Input Channels.
Using VTREG Symbols
In the Command page of the Output Window, you may make assignments to the VTREG symbols just like variables and registers. For example:
PORT2=0xDA00 set digital input PORT2 to 0xDA00.
AIN1=3.3 set analog input AIN1 to 3.3 volts.
Using User and Signal Functions
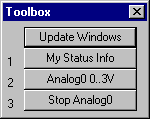
You may combine the use of VTREG symbols defined by the CPU driver and µVision3 user and signal functions to create a sophisticated method of providing external input to your target programs. The Analog Example shows a signal function that provides input to AIN0. The signal function is included in the MEASURE example and may be quickly invoked with the Toolbox button Analog0..3V and changes constantly the voltage on the input AIN0.
ProductsDevelopment Tools |
Hardware & Collateral |
Downloads |
Support |
Contact |