|
||
| Products Download Events Support Videos | ||
Technical Support
On-Line Manuals
µVision3 User's Guide
Hello: Your first Embedded Program
The HELLO sample program is located in ..\Examples\Hello folder helps you to confirm the correct installation of the toolchain. HELLO does nothing more than print the text "Hello World" to the serial port. The entire program is contained in a single source file HELLO.C.
This small application helps you confirm that you can compile, link, and debug an application which is performed with a µVision project file. The hardware for HELLO example typically operates on various microcontroller devices. The only on-chip peripheral used is the serial port (along with a baudrate generator). You do not actually need a target CPU because µVision3 lets you simulate the hardware required for this program.
HELLO Project File
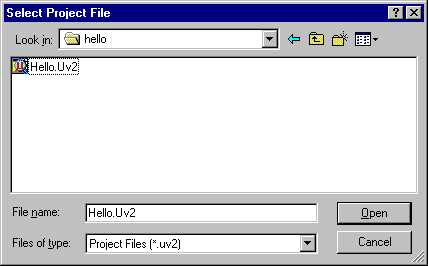
In µVision, applications are maintained in a project file. A project file has been created for HELLO. To load this project, select Open Project from the Project menu and open HELLO.UV2 from the folder …\ARM\GNU\EXAMPLES\HELLO.

Editing and Building HELLO.C
You can now edit HELLO.C. Double click on HELLO.C in the Files page of the Project Workspace. µVision3 loads and displays the contents of HELLO.C in an editor window.
![]() When you are ready to compile and link your
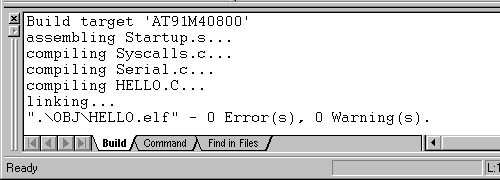
project, use the Build Target command from the Project
menu or the Build toolbar. µVision3 begins to translate and link the
source files and creates an absolute object module that you can load
into the µVision3 debugger for testing. The status of the build
process is listed in the Build page of the Output
Window.
When you are ready to compile and link your
project, use the Build Target command from the Project
menu or the Build toolbar. µVision3 begins to translate and link the
source files and creates an absolute object module that you can load
into the µVision3 debugger for testing. The status of the build
process is listed in the Build page of the Output
Window.

Notes
- You should encounter no errors when you use µVision3 with the provided sample projects.
Testing and Debugging HELLO.C
![]() Once the HELLO program is compiled and linked, you can
test it with the µVision3 debugger. In µVision3, use the
Start/Stop Debug Session command from the Debug menu or
toolbar. µVision3 initializes the debugger and starts program
execution till the main function.
Once the HELLO program is compiled and linked, you can
test it with the µVision3 debugger. In µVision3, use the
Start/Stop Debug Session command from the Debug menu or
toolbar. µVision3 initializes the debugger and starts program
execution till the main function.
![]() Open Serial Window #1 that displays the
serial output of the application with the Serial Window #1 command
from the View menu or the Debug toolbar.
Open Serial Window #1 that displays the
serial output of the application with the Serial Window #1 command
from the View menu or the Debug toolbar.
![]() Run HELLO with the Run command from the
Debug menu or toolbar. The HELLO program executes and displays the
text "Hello World" in the serial window. After HELLO outputs "Hello
World," it begins executing an endless loop.
Run HELLO with the Run command from the
Debug menu or toolbar. The HELLO program executes and displays the
text "Hello World" in the serial window. After HELLO outputs "Hello
World," it begins executing an endless loop.
![]() Stop Running HELLO with the Halt command
from the Debug menu or the toolbar. You may also type ESC in the
Command page of the Output window.
Stop Running HELLO with the Halt command
from the Debug menu or the toolbar. You may also type ESC in the
Command page of the Output window.
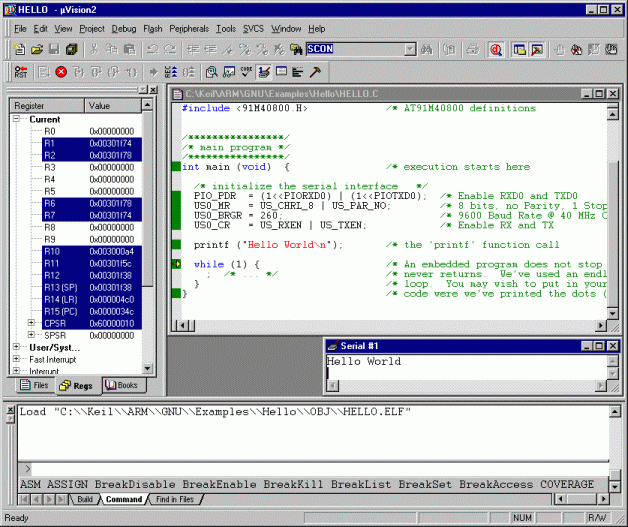
During debugging µVision3 will show the following output:

Single-Stepping and Breakpoints
![]() Use the Insert/Remove Breakpoints command
from the toolbar or the local editor menu that opens with a right
mouse click and set a breakpoint at the beginning of the main
function.
Use the Insert/Remove Breakpoints command
from the toolbar or the local editor menu that opens with a right
mouse click and set a breakpoint at the beginning of the main
function.
![]() Use the Reset CPU command from the Debug menu or
toolbar. If you have halted HELLO start program execution with
Run. µVision3 will stop the program at the breakpoint.
Use the Reset CPU command from the Debug menu or
toolbar. If you have halted HELLO start program execution with
Run. µVision3 will stop the program at the breakpoint.
![]() You can single-step through the HELLO program using the
Step buttons in the debug toolbar. The current instruction is marked
with a yellow arrow. The arrow moves each time you step.
You can single-step through the HELLO program using the
Step buttons in the debug toolbar. The current instruction is marked
with a yellow arrow. The arrow moves each time you step.
![]() Place the mouse cursor over a variable to
view their value.
Place the mouse cursor over a variable to
view their value.
![]() You may stop debugging at any time with Start/Stop
Debug Session command.
You may stop debugging at any time with Start/Stop
Debug Session command.
ProductsDevelopment Tools |
Hardware & Collateral |
Downloads |
Support |
Contact |
