|
||
| Products Download Events Support Videos | ||

Technical Support
On-Line Manuals
RL-ARM User's Guide (MDK v4)
Simulation
Programs you create with the RL-CAN Real-Time Library CAN Driver may be tested using the simulation capabilities of the µVision® IDE. Simulation allows you to test your CAN application before target hardware is ready.
Follow these steps to test an RL-CAN example application using the µVision Simulator.
- Copy the example from \Keil\ARM\Boards\Keil\MCB2100\RL\CAN\CAN_Ex1 or from \Keil\ARM\Boards\Keil\MCB2100\RL\CAN\CAN_Ex2 directory to any directory you want to use.
-
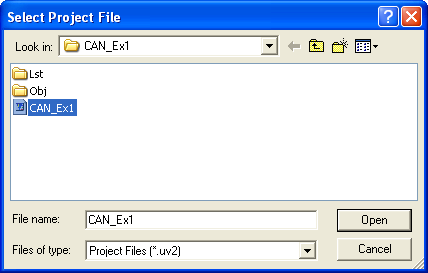
Select and load the project file CAN_Ex1.uv2 or CAN_Ex2.uv2
into µVision . This file is located in the folder copied in step 1.
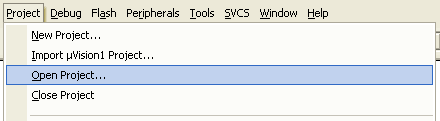
In µVision, use Project — Open Project...
-
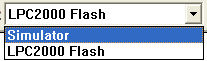
Select the target Simulator.
-
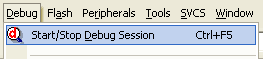
Click on Debug — Start/Stop Debug Session on the menu
bar or click the toolbar button to run the simulation.
-
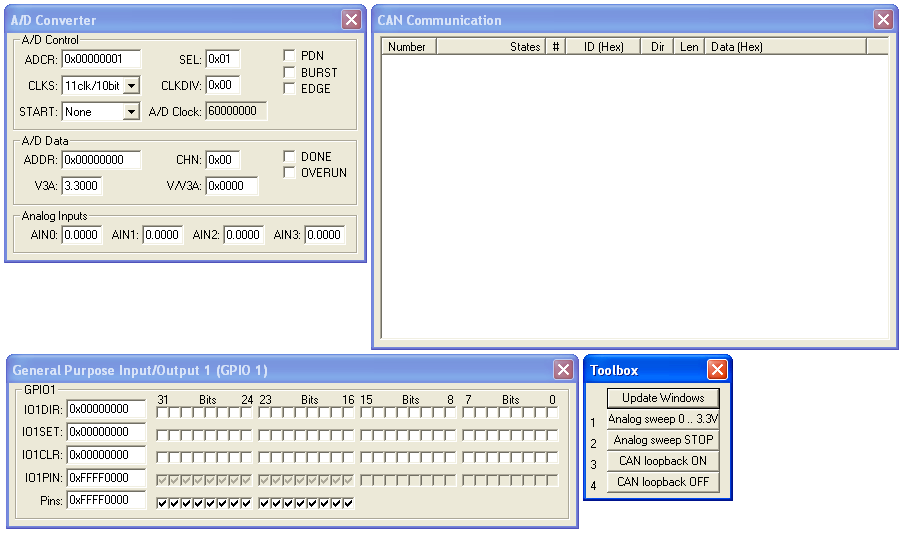
New windows appear as shown below. These windows show the
device peripheral functionality.
-
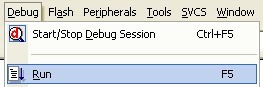
Click on Debug — Run to start the simulation.
-
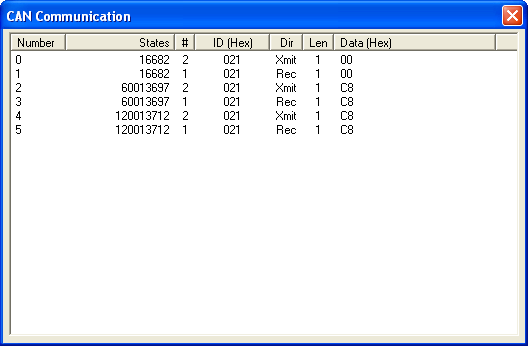
The communication messages display in the CAN
Communication window.
-
Click on the Analog sweep 0 .. 3.3V button, on the
Toolbox window, to start the analog value changing by rising
from 0 V to 3.3 V and lowering from 3.3 V to 0 V. You can stop the
analog value change by clicking on Analog sweep STOP.

-
Click on the button CAN loopback ON, on the Toolbox window, to enable simulation of the hardware connection (loopback) between the CAN 1 and CAN 2 ports.
Click on CAN loopback OFF to turn off the simulation of the loopback connection between the CAN ports.
-
After enabling the loopback in the previous step, you can watch
changes in the General Purpose Input/Output 1 (GPIO 1)
window on bits 23 .. 16, according to analog input
value.

-
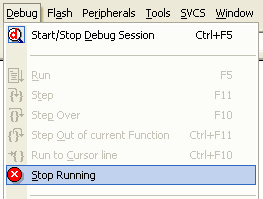
Stop the simulation before exiting µVision by clicking on
Debug — Stop on the Debug menu.
ProductsDevelopment Tools |
Hardware & Collateral |
Downloads |
Support |
Contact |