|
File System Component
Version 6.16.6
MDK Middleware for Devices with Flash File System
|
|
File System Component
Version 6.16.6
MDK Middleware for Devices with Flash File System
|
The File System Component is used in many different applications and examples. One stand-alone example is available to demonstrate the usage of the File System. Other examples use the File System Component in conjunction with other Components (such as USB or Network for example).
These examples are available through the ; select the related board and copy the example.
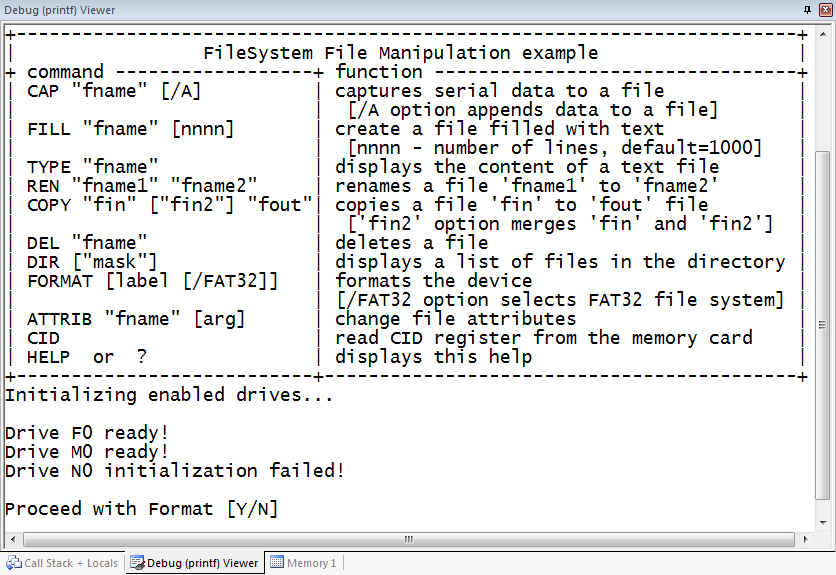
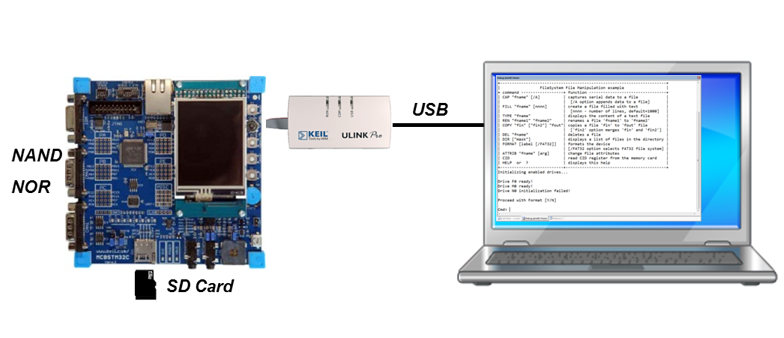
This example shows how to manipulate files on a given drive using the File System Component. You can create, read, copy, and delete files on any enabled drive (memory Card, NOR/NAND Flash) and format each drive. To keep it simple, the in MDK interacts and connect with the storage devices and your stdio. The following picture shows an exemplary connection of the development board and a computer:
The Abstract.txt file contained in the Documentation group of the Project window gives you more information on the general setup and the available I/O of the development board.
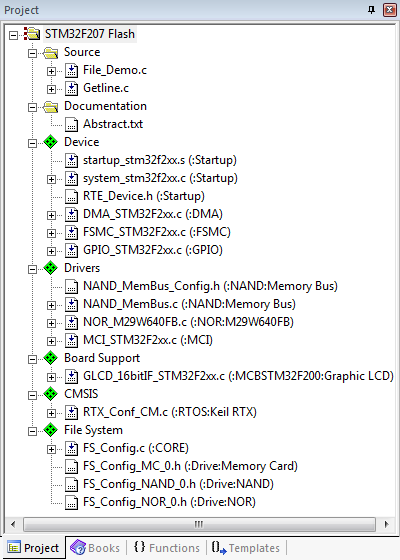
Open the example project in MDK (the web page explains how to do this). The µVision Project window should display a similar project structure:
You may now build and download the example project to the evaluation board using the µVision commands:
After these steps, the project should start executing on your evaluation kit. In case of errors, refer to the Evaluation Board User's Guide for configuration information.
The setup of the Evaluation Board hardware is described in the Abstract.txt file.
After building the program, download the code into Flash and start a Debug session. Open the Debug (printf) Viewer window and start the code execution by either pressing F5 or using the Run button. You should now see something similar like this: