|
||
| Products Download Events Support Videos | ||

Technical Support
On-Line Manuals
MCBTSX1001 User's Guide
BLINKY
The BLINKY example program toggles the LEDs on GPIOA and displays the converted A-to-D value on the LCD screen in text and bar graph form and prints the converted A-to-D value to the serial port. The toggle speed of the LEDs depend on the input voltage of the ADC input.
The BLINKY example project demonstrates assembling, compiling, linking, downloading, and debugging using the µVision IDE on the MCBTSX1001 board. The on-board LEDs make it easy to visually verify that the program loads and executes properly.
Loading BLINKY
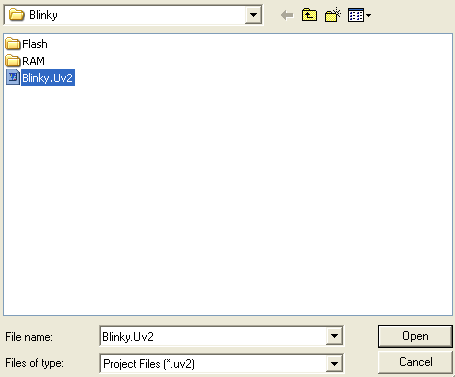
To load the BLINKY project, select Open Project from the Project menu and open BLINKY.UV2 from the following folder:
- \KEIL\ARM\BOARDS\KEIL\MCBTSX1001\BLINKY\
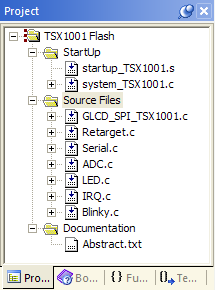 When the BLINKY project
opens, the µVision Project Workspace window displays the
source files that make up the project.
When the BLINKY project
opens, the µVision Project Workspace window displays the
source files that make up the project.
- startup_TSX1001.s contains the CPU startup code for the Triad Semiconductor TSX1001 device.
- system_TSX1001 configures system clock and timer settings.
- GLCD_SPI_TSX1001.c, contains the functions to produce text and graphics for the LCD display.
- Retarget.c configures the target-dependent low level functions for character I/O.
- Serial.c, contains the functions to communicate to the serial port.
- ADC.c, contains the functions to communicate to the analog to digital converter.
- LED.c, contains the functions to communicate to the GPIOA port.
- IRQ.c, contains the functions to communicate with the Vectored Interrupt Controller.
- Blinky.c contain the application modules that monitors analog input, provides the LCD output, and toggles the LEDs.
The Abstract.txt file contains documentation about the project.
Editing BLINKY
You may edit Blinky.c or review the source code. Double click on Blinky.c in the Files page of the Project Workspace window. µVision loads and displays the contents of Blinky.c in an editor window.
Running BLINKY
Perform the following four steps to run the BLINKY Example on the MCBTSX1001 Evaluation Board:
ProductsDevelopment Tools |
Hardware & Collateral |
Downloads |
Support |
Contact |